Making any kind of bread with yeast always used to scare the crap out of me. I didn't understand yeast and why or how it does its magical yeast business. All I knew is that it was that mystical ingredient that makes bread good and that I didn't know how to use it. Then, J got me Alton Browns
I'm just here for more food for Christmas. I spent the afternoon reading and learned a whole lot about breadmaking. Armed with my new knowledge, I set out to make some artisan bread. And I failed miserably. It was a dense loaf of cardboard, or at least it tasted like it. Anyways, the point is that I kept trudging along, making a new recipe or loaf every week. Sometimes they were a hit, sometimes a miss. I bought a thermometer to help me understand how to "proof" the yeast, and used it up until a few months ago when I kinda got the hang of knowing what the right water temperature
feels like. I recommend buying or checking out that book, because in order to make good bread, you need to understand what you're doing.
Novel concept, yes?
Anyways, this weekend I set out to make English Muffins. I did. They were good. You should also make them. You don't even need to proof the yeast, thats how easy this is :)
Here's what you'll need:
-
1 1/4 cup milk
-
2 tablespoons white sugar
-
1 tsp yeast
- 3/4 cup warm water (if you have a thermometer, about 125 degrees)
- 1/4 cup melted butter
-
6 cups white whole wheat flour
-
1 teaspoon salt
First, heat milk and water in a small saucepan until very warm to the touch, but not boiling. Set aside to cool for 15 minutes. In the meantime, combine 3 cups of the flour, sugar, salt, yeast. Melt your butter. Test the milk and water mixture with your finger after 15 minutes is up. Did you pull your finger out and go "OW?!" If so, wait another 15 minutes. If its still warm to the touch but not painful, pour it into your flour mixture along with the melted butter and whip with a whisk until the mixture is smooth. See above (of course, you can avoid all this finger burning business if you just go out and buy a damn thermometer).
Now, add in the rest of your flour. It will not be smooth. See above.
Flour your surface (in my case, counter) and scrape the dough onto the floured area. Begin to knead the dough by pulling the sides up (see above)....
...and pushing them into the middle of the dough (see above). Continue doing this, and adding more sprinklings of flour when it starts to feel sticky. Now, please do not
assault the dough. Push it in, but do not grind the dough into your counter. Violence never made good bread. At least I don't think? Anyways....
Work it continuously until the becomes elastic and smooooooth like butta.... See above!
Take a clean bowl and grease the bottom with a teaspoon of oil. Coat the bottom of the bowl with oil and put your dough in. Then, flip it over. Now, Both sides have oil on it. This oil will help it rise.
This is what dough looks like after it has risen for one hour. Don't you dare try and take it out any sooner, either.
Plop your risen dough out of the bowl and onto the counter, handling it carefully. Flour it lightly. With a rolling pin, roll out the dough to about a half inch thick. Then, get your cookie cutter, biscuit cutter or something else that is round (I used a 2 1/2 inch glass) and begin to cut out your muffins. Place them on a smooth surface where they will be safe to rise for another 40 minutes. By safe, I mean a place where the dog cant reach. I learned this the hard way.
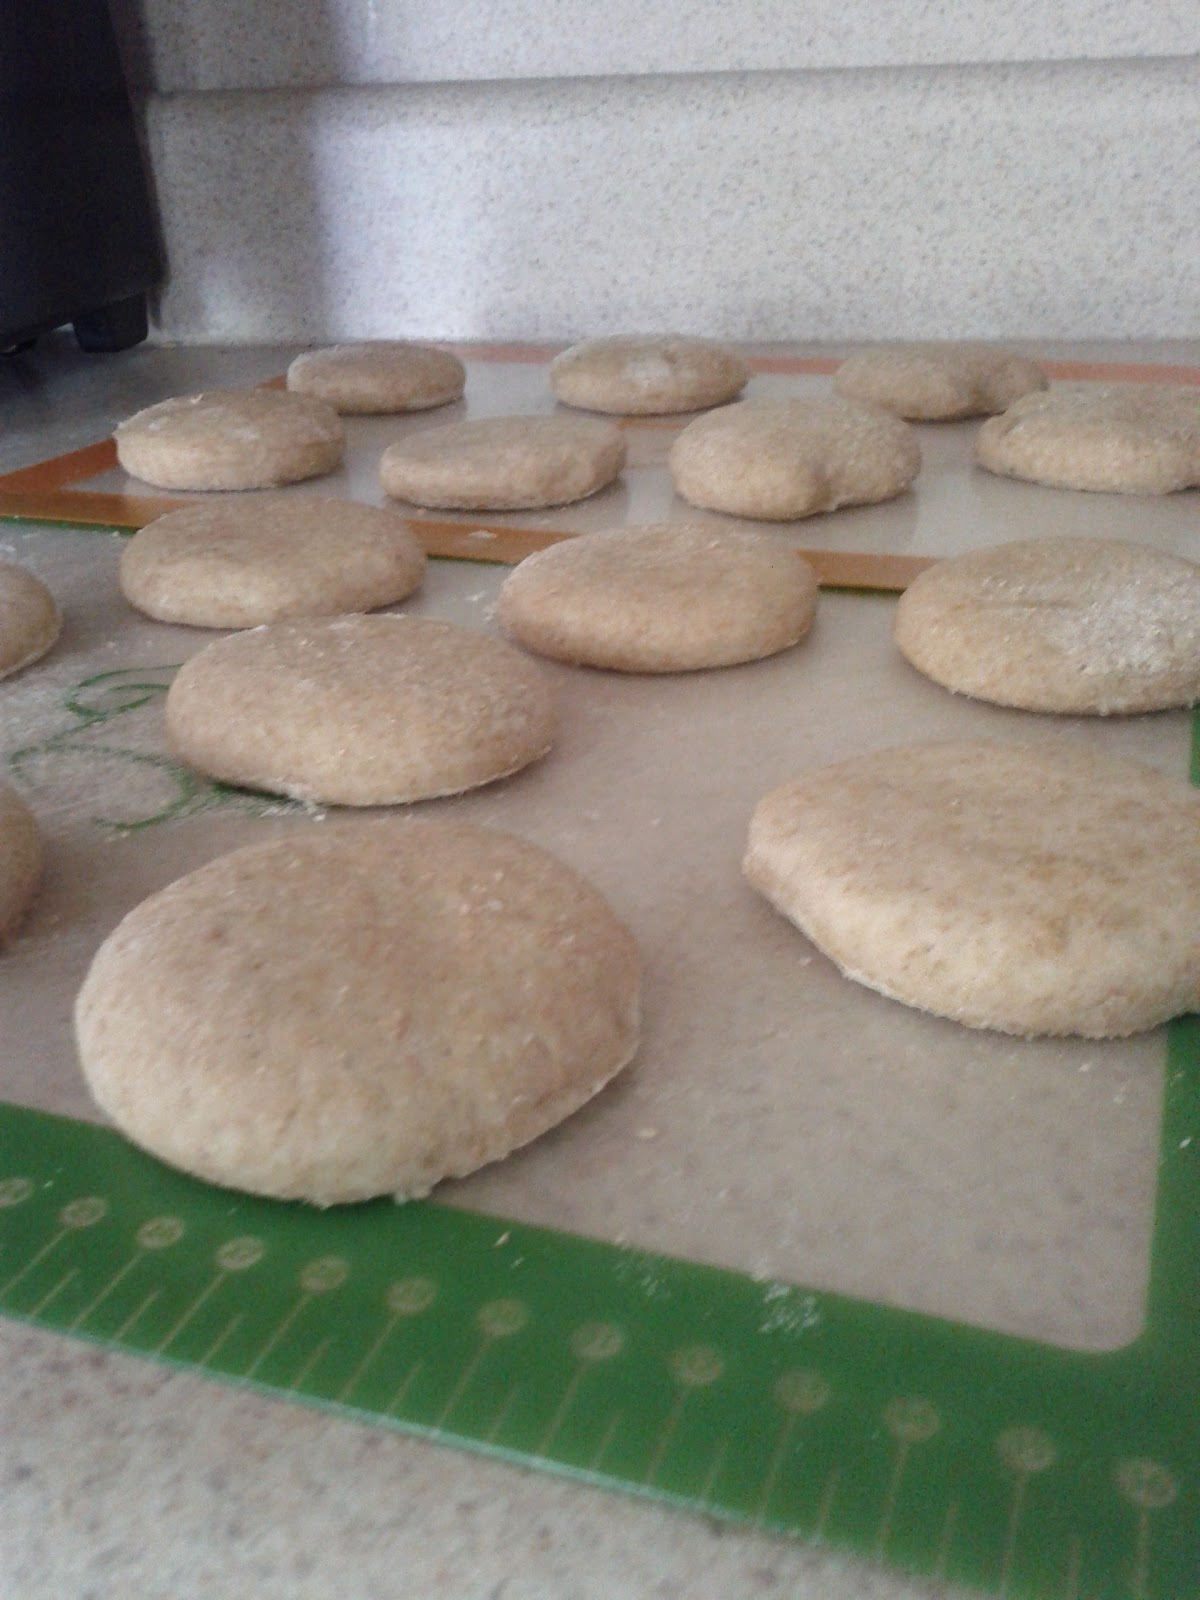
Yay! Risen muffins!
Here comes the fun part! In a skillet (or griddle if you have one, you lucky duck) lightly grease with a tsp of oil. Turn on medium heat. Toast the muffins until a deep brown on each side. Dont keep the heat up too high, as you dont want to toast the outside and have a raw inside. That is not a good muffin. I had to toast 4 at a time, so this step took me a while. But oh, was it worth it!
Hooray, Muffins!!! I got about 18 muffins out of my dough. You may get more or less depending on the size of your cutter. When you are ready to eat, split with a fork, toast lightly, and top with butter, jam, or in our case eggs and bacon. I then individually wrapped these and stuck them in the freezer for breakfasts later. Not before eating one though :)


No comments:
Post a Comment